After coding and tweaking the website how to put your website online? The process of uploading your website will depend on the domain and hosting provider. Upload an HTML file to the hosting will publish on your domain.
You can use File Transfer Protocol to do this and can upload files by using the hosting service’s control panel. You will need five purchase both website domain and web hosting service before upload your website.
So, In this article, we will teach you about how to upload a website to a domain in five easy steps. So, continue the article reading
05 Steps To Upload A Website To A Domain
Here are the steps to upload a website to a domain. You can use the following steps:
1) Select A domain and Hosting
2) Select Website Upload Method
- File Transfer Protocol (FTP) /Using FileZilla
- File Manager
- WordPress Migration Plugins
3) Uploading Files To A Web Server
- Using Control Panel
- Using File Transfer Protocol (FTP)
4) Move your Website Files to the Main Root Directory.
1. Select A domain and Hosting:
Before uploading the website the first step you need to do is get a domain name and web hosting service. When selecting a hosting platform, it is vital to select a provider with fast performance and good security, provide the resources needed to publish the website’s files, and as well as accessible customer service.
Before you can buy your domain, you will need to pick out a host. There are many famous hosting service providers include GoDaddy, Bluehost, WPengine, and Squarespace.
Be sure to research all your options and the pros and cons of each so that you can make a good choice for your website.
2. Select Website Upload Method:
After choosing a domain and hosting plan the next step is to select the method for uploading your website. Here are the four most popular methods to upload a website.
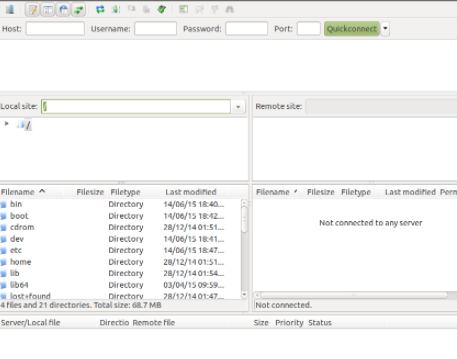
Using File Transfer Protocol (FTP) / FileZilla:
The File Transfer Protocol is a communication protocol used for the migration of computer files from a web server to a client on a computer network.
Many hosting providers include a File Transfer Protocol (FTP) service, so you can use it to connect to an FTP client. FTP clients were just command-line interface applications a few years ago.
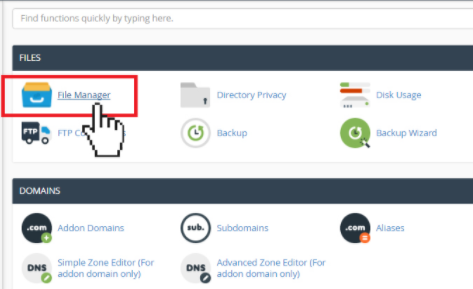
File Manager:
File Manager is a software program that helps people manage all the files on their computers. All file managers allow the viewers to view, update, add, edit, copy, and delete the files on your computer storage devices.
In Control Panel, you can search File Manager under the Files section. However, the File Manager has an upload limit. If your website files are greater than 256MB, you should select the next tool instead.
WordPress Migration Plugins:
If you plan to use WordPress, and looking for the WordPress migration plugin to move your website. There are different ways to upload your website into WordPress.
You need to transfer the database, files, plugins, and theme. You also want to reduce downtime, so your users do not see a broken website layout. The upload size limit will rely on your web hosting company.
There are different WordPress migrations plugins are given below:
- All in One WP Migration.
- Duplicator Pro
- UpdraftPlus Premium
- Migrate DB Pro
3. Uploading Files To A Web Server:
After choosing the best method to upload a website. Now, it is time to upload the HTML file to the website. In this topic, we will teach you how to upload your website by using Control Panel and File Transfer Protocol (FTP).
Using Control Panel :
- Log into your web hosting service’s control panel.
- Find the hosting service’s file manager.
- Open the file manager.
- Click the Upload option. If you selecting Upload opens your computer’s File Explorer, skip the next step.
- Open the “public_html” folder.
- Click on Upload Files.
- Go to your website’s files’ location.
- Choose your website’s files.
- Click Open Button.
- Click Upload Button.
- Access your website.
Using File Transfer Protocol (FTP):
- Find your hosting service’s FTP information.
- Open FileZilla.
- Click on File >> Site Manager >> Click New site
- Enter a name for your website.
- Make sure you’re using FTP.
- Enter your website address.
- Click the “Logon Type” drop-down box.
- Click Normal Button.
- Enter your FTP login credentials
- Go to your website’s files’ location
- Select your website’s files.
- Transfer your website’s files into the website’s “public_html” folder.
- Access your website.
4. Move the Website Files to the Main Root Directory:
In a few cases, a further directory can be created when you add website files. As a result, website visitors could be directed to yourdomain.com/subfolder instead of the default yourdomain.com.
To protect that from happening, you want to ensure all of the files are positioned with inside the root directory of your domain, that’s public_html.
5. Import Your Database:
If your site uses a database, you will also need to import the database along with your website files. So, follow these steps:
- Create a new MySQL database and user.
- Access your newly created database via phpMyAdmin.
- Select the destination database on the left panel.
- Use the Import section to upload the backup file of the database.
- Click on the Import tab in the top center panel.
- From the Format dropdown menu select ‘SQL’.
- Click the Go button to import the database
Conclusion :
In this article, we told you about how to upload a website to a domain? So, To quick recap, here are the steps to upload your website:
- Choose the right domain and web hosting.
- Select the method to upload your website.
- Upload your website Html files.
- Transfer the website files to the main root folder.
- Import your database.